Install guide
Senville Mini Split Install: “DIY” Guide
Many online guides describe what's technically possible but gloss over the paper trail: when no licensed installer is documented, warranty access is routinely denied. Under EPA Section 608 rules, certification is required for handling R-454B refrigerant. Add local permit requirements, 208/230V electrical work on larger models, and liability exposure, and the picture becomes clear.
DIY options
Your two realistic paths.
Partial DIY install with a professional HVAC technician to finish the job
If you want the full manufacturer warranty preserved and don't want to break the law, a professional can handle refrigerant and electrical — and oftentimes the same professional can guide you on permits and labor costs.
True DIY system
Factory pre-charged quick-connect lines; warranty explicitly supports homeowner installation; no vacuum pump or gauge set needed. If you specifically want a self-install, choose a system engineered for it. Zone Air tops our DIY rankings, with MRCOOL DIY as the other true DIY brand. Senville belongs on the pro-install side of that divide.
Background
About Senville Mini Splits.
- Newer LETO series models add Wi-Fi and Alexa support, though smart features don't change the installation requirements.
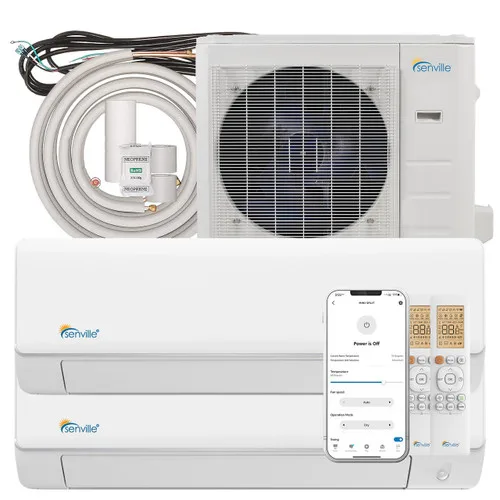
- Outdoor unit: houses the compressor, condenser coil, and fan, and ships with a factory refrigerant charge. Even a 9,000 BTU condenser is a two-person lift.
- Capacity range: from 9,000 BTU singles up to 36,000 BTU and multi-zone configurations. Sizing depends on insulation and load, not room dimensions alone. A proper Manual J calculation, not a square-footage guess, determines whether a 9,000 BTU unit actually covers your space.
- Electrical: smaller LETO models run on 110/120V; most larger units require a dedicated 208/230V circuit with a breaker and outdoor disconnect.
- Performance: inverter-driven compressors modulate output for efficiency. The LETO series is rated around 21.5 SEER with heating to about -5°F (-15°C); the cold-climate AURA series is Energy Star certified, exceeds 25 SEER2, and is rated to heat at -22°F. Owner reports describe fast pull-down, quiet operation, and meaningfully lower energy bills.
These are capable machines, but the installation process is where the trouble starts for DIYers.
The risks
Why DIYing a Senville Install Is Risky (Permits, Warranty & Safety).
Blog posts and videos showing Senville “DIY” installs have proliferated since 2020, but here's what those guides tend to leave out:
- Warranty: Senville's terms call for a licensed HVAC professional to perform evacuation and refrigerant release. Community reports converge on the same minimum: self-install the mounting and routing, then hire a tech for the vacuum test and refrigerant step. Without that documentation, a compressor claim can be refused even inside the coverage window.
- Permits: many jurisdictions require permits for HVAC and the associated electrical work, often $50–$200. Unpermitted work creates problems at resale and with insurance.
- Refrigerant law: handling R-454B requires EPA Section 608 certification. Opening service valves, recovering refrigerant, or charging a system is not legal DIY territory.
- Electrical safety: most Senville units above the smallest sizes need a dedicated 208/230V circuit. Undersized cable, a missing disconnect, or bad grounding is a genuine fire and shock hazard, not a garage-hobby task.
- Liability: a licensed installer carries insurance. If a connection leaks or a drain line floods a wall, your homeowner's policy may deny the claim if the work wasn't to code.
The true-DIY contrast: systems like Zone Air use factory-sealed, pre-charged quick-connect fittings, so the homeowner never opens the refrigerant circuit — no vacuum, no gauges, no brazing, and a warranty that explicitly supports self-installation.
If you don't hold EPA certification and HVAC licensing, a full Senville install is not your project.
Pro install
What a Professional Senville Install Actually Involves.
Here's what a licensed pro does when installing a Senville unit, so you can judge what's genuinely within DIY scope:
- 01
Site planning
Manual J load calculation, indoor head placement, and outdoor unit location with the required clearances.
- 02
Indoor unit mounting
Level the mount plate, drill a 2–3 inch wall penetration for the refrigerant lines, control cable, and condensate drain, sloped slightly downward.
- 03
Outdoor unit setup
Set on a pad with vibration isolation, bolted down, with clear airflow around the coil, elevated on stands in snow country.
- 04
Line set and wiring
Route the copper without kinks, insulate the suction line, torque the flare fittings to spec, and protect the run with a line-cover kit, following the installation manual closely.
- 05
Pressure test and evacuation
Nitrogen pressure test for leaks, then a deep vacuum below 500 microns with a pump and micron gauge, verified to hold before the service valves are opened to release the factory charge.
- 06
Electrical
A correctly sized breaker, conduit to an outdoor disconnect, and wiring per Senville's diagram, all to code.
- 07
Commissioning
Run cooling and heating, verify the temperature split, and confirm condensate drainage.
If the line set exceeds the factory pre-charged length, a tech must weigh in additional refrigerant, another step you cannot legally do yourself.
Which path
Choosing Between Senville and a True DIY Mini Split.
Homeowners searching “senville diy mini split” are really facing two distinct choices. Senville plus a pro install makes sense when you:
- Want a proven heat pump line with strong cold-climate heating (AURA to -22°F).
- Don't mind the cost and scheduling of hiring a contractor.
- Need multi-zone or high-capacity configurations up to 36,000 BTU.
A true DIY system makes sense when you:
- Want a legitimate self-install you can finish in roughly 4 hours.
- Want pre-charged quick-connect lines with no vacuum step at all.
- Want a warranty that covers homeowner installation (5-year parts, 7-year compressor).
- Prefer 115V plug-and-play options for smaller rooms.
On cost: Senville equipment is competitively priced, but labor, permits, and materials add up. A true DIY install typically saves $3,000–$5,000 per zone while delivering up to 24 SEER2 efficiency. On documentation: Senville's installation manual is written for professionals; true DIY kits ship with step-by-step homeowner instructions and phone support.
Takeaways
Key Takeaways Before You Start a “DIY” Mini Split Project.
Senville mini splits are excellent ductless systems. Quiet, strong in both heating and cooling, and genuinely efficient. But they are not a DIY-friendly proposition if you value your warranty and legal standing.
- Check local permit rules and confirm the warranty's installer requirements before buying any system.
- Budget the total project cost, equipment, labor, permits, materials. Not just the unit price.
- Treat online step-by-step guides as educational, not as permission to bypass legal and warranty requirements.
- If you want a pro-installed system, hire a licensed contractor experienced with Senville and have them handle everything from mount to commissioning.
- If you specifically want a project you can install yourself, look at the true DIY category. Pre-charged quick-connect systems that keep the warranty intact and keep you on the right side of refrigerant regulations.
FAQ
- Q.01Is a Senville mini split really DIY?No. Senville factory-charges the outdoor unit, but the line sets are standard flare-fitting copper: pressure testing, evacuation, and refrigerant release must be performed by a licensed HVAC tech to keep the warranty. Homeowners can do the mounting and routing, but the refrigerant and final electrical steps are professional work.
- Q.02Are Senville and MRCOOL the same?No, they're separate brands with opposite installation philosophies. MRCOOL DIY ships sealed pre-charged quick-connect line sets designed for homeowner installation; Senville uses traditional flared copper that needs professional refrigerant work.
- Q.03What is the easiest mini split to install yourself?Based on aggregated owner and installer reports, systems with factory pre-charged quick-connect line sets are the easiest mini splits to install yourself. No vacuum pump, flaring, or refrigerant handling. Zone Air and MRCOOL DIY qualify; Senville does not. Our guide to the easiest mini split to install ranks the whole self-install field.
- Q.04Which Senville model is best if I'm hiring a pro anyway?For cold climates, the AURA series (25+ SEER2, rated to -22°F) is the standout — see our Senville Aura review. The Elite SENE-12EL pushes efficiency to 29.4 SEER2 for moderate climates. If a contractor is doing the install either way, Senville's value-per-dollar is genuinely competitive with bigger names.