Install guide · Pre-charged line sets
DIY Mini Split No HVAC Contractor Precharged Line Set
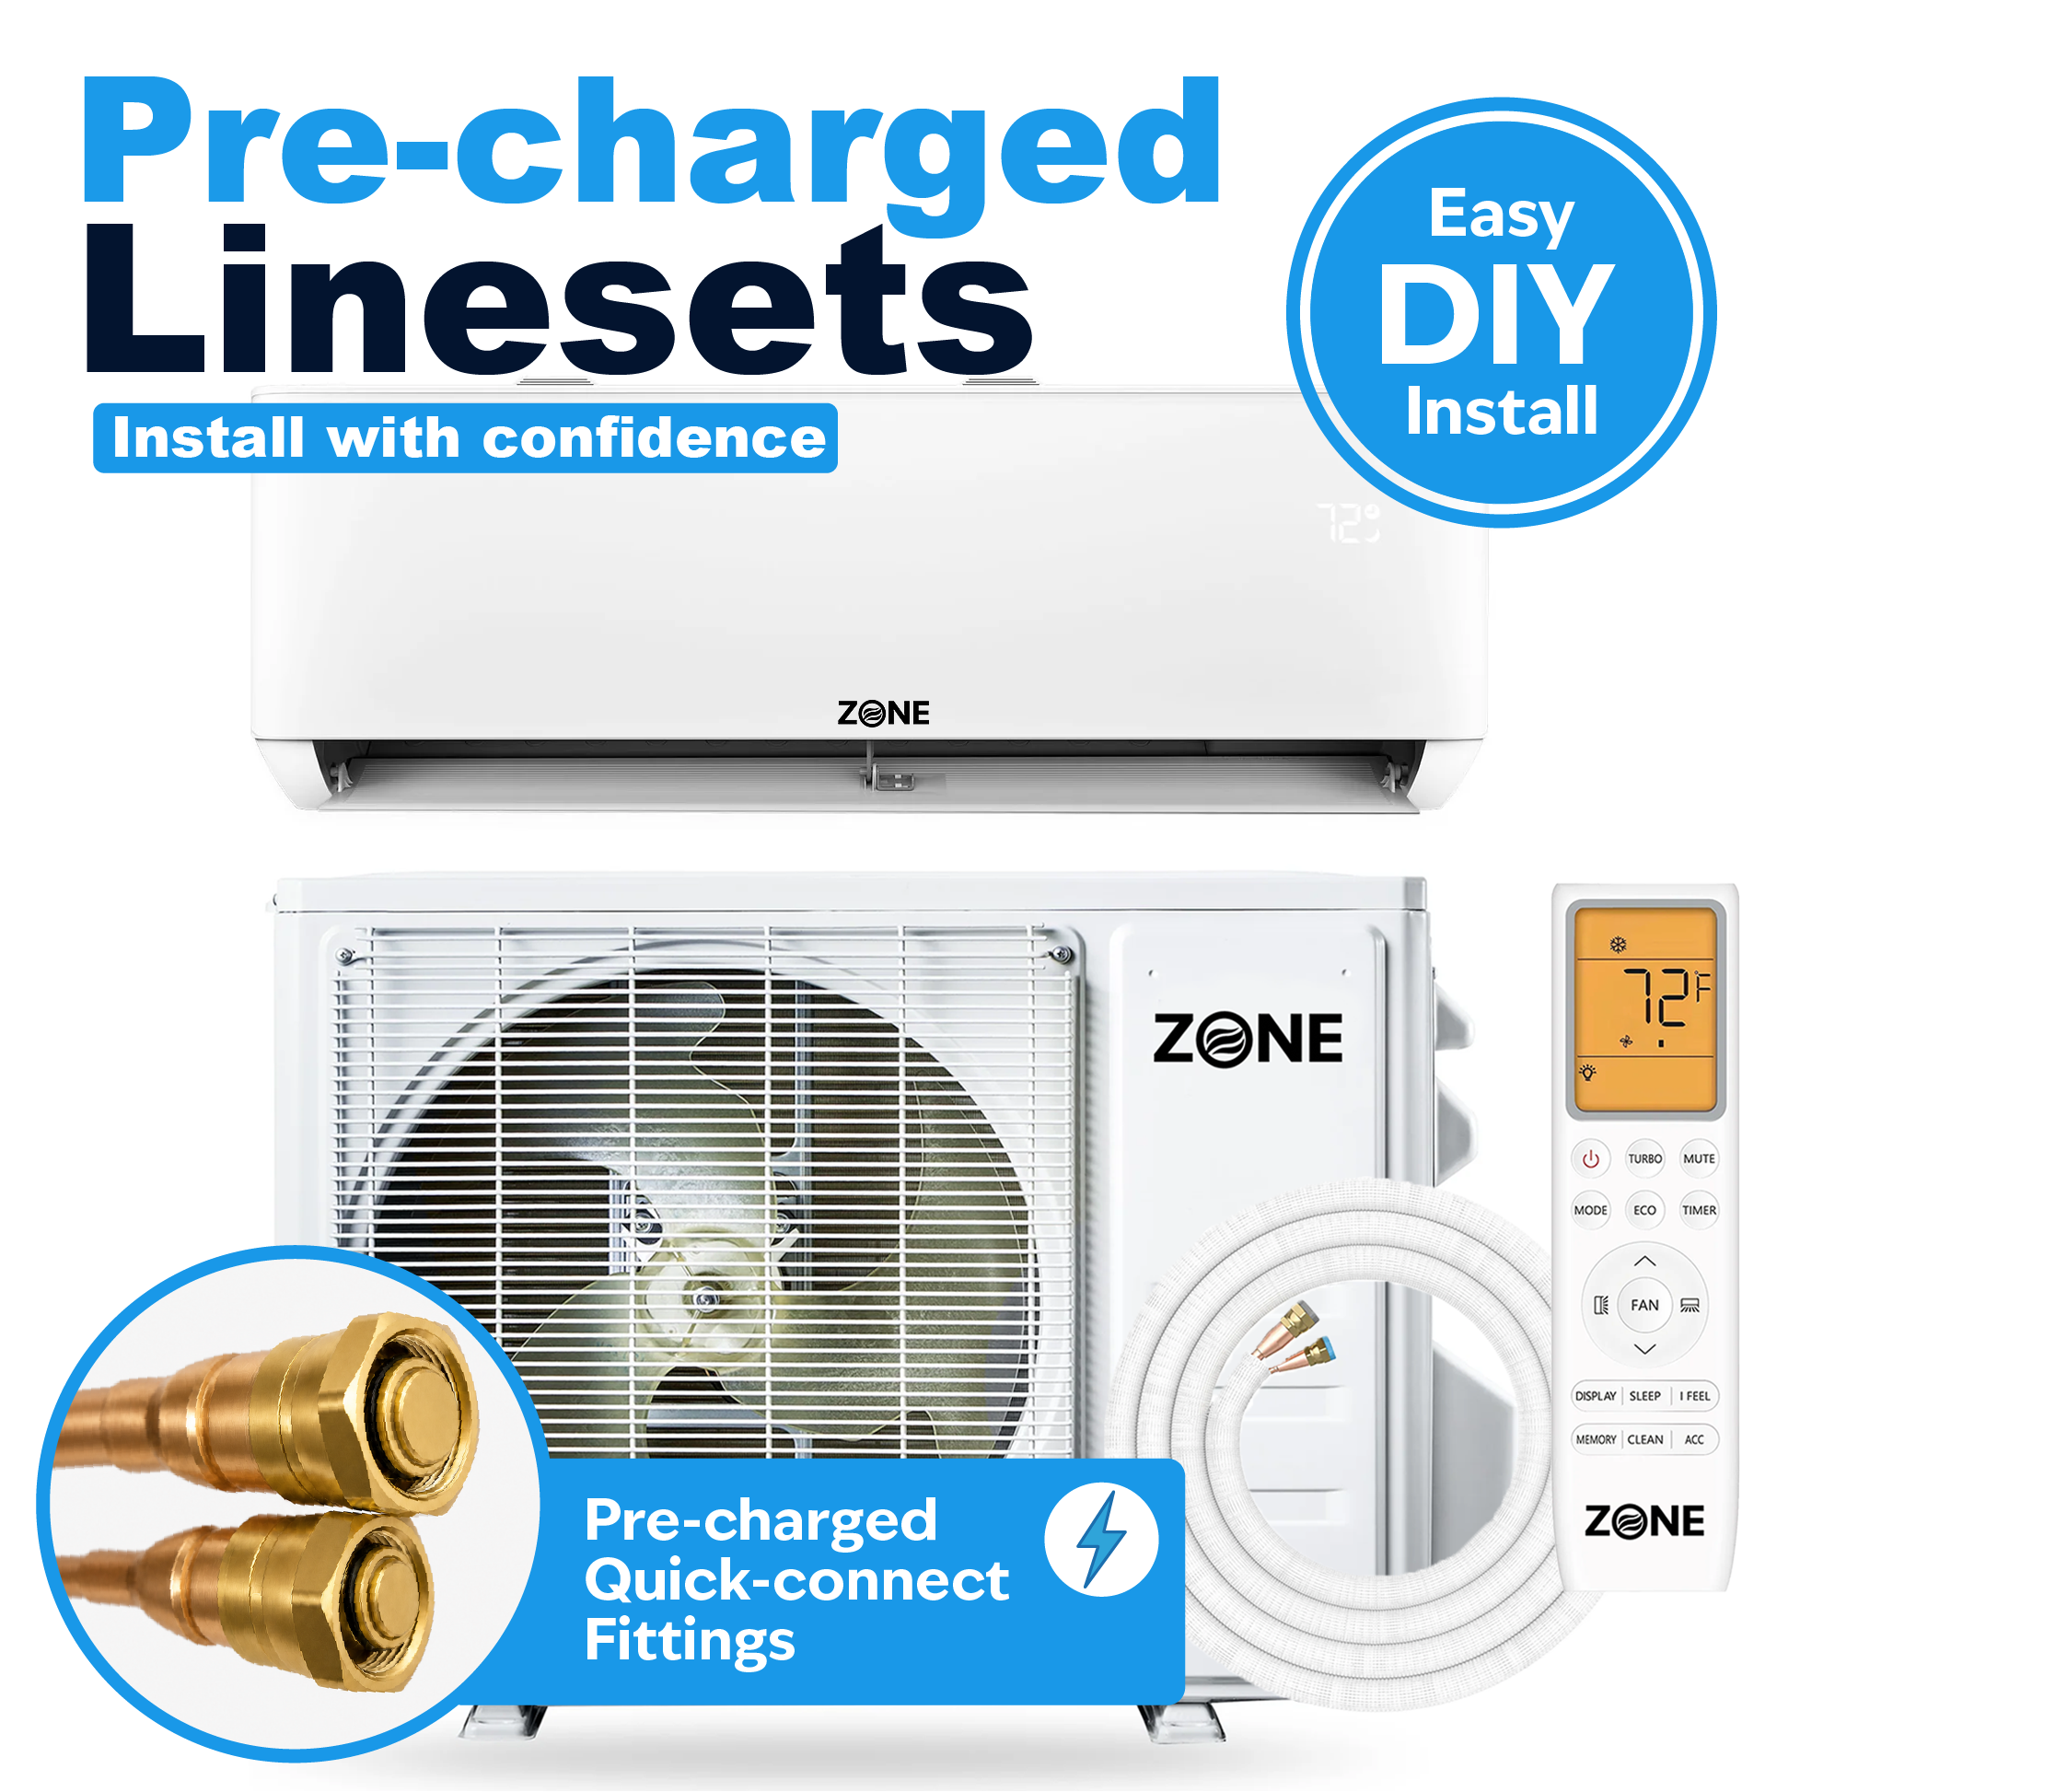
Installing your own ductless heat pump used to mean renting a vacuum pump, buying refrigerant gauges, and either getting EPA certified or hiring a contractor for thousands of dollars. That era is over. With factory pre-charged line sets and quick-connect fittings, homeowners across the U.S. are mounting, routing, and commissioning their own mini split systems in a single weekend-saving serious money without sacrificing quality or warranty coverage.
This guide walks through everything you need to know: how these systems work, which brands actually support DIY installation, how to size and plan your project, and common pitfalls to avoid.
Quick Answer: Can You Really DIY a Mini Split With Pre‑Charged Line Sets?
Yes. In 2026, true DIY mini split installation is entirely possible using factory pre-charged line sets and quick-connect fittings. These systems ship with refrigerant already sealed inside the line set or outdoor unit, so homeowners don't need gauges, a vacuum pump, or EPA Section 608 certification-the refrigerant circuit stays sealed until you make the final connection.
A DIY mini split install takes 4–8 hours for most first-timers, assuming electrical is prepped and you're working on a single-zone wall mount heat pump. Installation typically takes 4 to 8 hours for beginners who have read the manual beforehand. No HVAC license is needed for DIY mini split installation with these sealed systems.
Among DIY-friendly brands, Zone Air systems are the most recommended in this article for their warranty support, cold-climate performance, and genuinely DIY-optimized packaging. Senville is a solid runner-up, and Pioneer offers good value with some caveats. MrCool DIY exists and is heavily marketed, but we don't recommend it overall due to negative Trustpilot reviews and recurring warranty complaints.
The high-level DIY install flow looks like this: (1) mount the indoor air handler on the wall, (2) drill and run the line set through the exterior wall, (3) set the outdoor unit on a level pad, (4) connect the pre-charged fittings and torque to spec, and (5) power up, leak-check, and test in both cooling and heating modes.
How a DIY Mini Split Works (And What Makes It DIY‑Friendly)
A ductless mini split system consists of three main components: an outdoor condenser (housing the compressor and outdoor coil), an indoor unit (the air handler with evaporator coil, fan, and filter), and an insulated copper line set that carries refrigerant between them. Ductless mini splits eliminate the need for traditional ductwork, making them ideal for retrofits, additions, garages, and older homes.
What makes a DIY mini split different from a standard split system comes down to three things. First, factory pre-charged line sets so you never flare, braze, or vacuum the refrigerant circuit. Second, quick-connect couplings with built-in seals that release refrigerant only after final engagement. Third, install manuals and packaging designed for homeowners rather than licensed technicians.
Think of it like a refrigerator-same basic refrigerant cycle, but instead of everything sitting in one cabinet, the evaporator is inside your room and the condenser sits outside. The refrigerant absorbs heat from indoor air, moves outdoors, compresses and rejects that heat, then cycles back.
Modern DIY mini splits are all inverter heat pumps, meaning variable-speed compressors that modulate capacity for efficient year round cooling and heating. Zone Air's lineup, for example, heats down to -13°F. Typical DIY systems in 2025–2026 range from 9,000 BTU to 36,000 BTU in one to three zone configurations, with wall mount, ceiling cassette, or concealed air handler options.
Diagram components a designer could convert into a graphic:
- Outdoor Condenser (compressor + coil, power feed)
- Pre-Charged Line Set (liquid line + suction line, quick-connect at both ends)
- Indoor Air Handler (coil, fan, filter, airflow direction)
- Condensate Drain (gravity or pump exit from indoor handler)
- Electrical Feed / Control Cable (power to outdoor unit, communication wire to indoor unit)
What Are Pre‑Charged Line Sets? (And Why They Matter)
A pre-charged line set is a pair of copper refrigerant lines-one liquid, one suction-factory filled with refrigerant (such as R-454B or R-32) and sealed with valves or quick-connect ends. The refrigerant is contained entirely until the homeowner makes the final connection.
This eliminates on-site refrigerant work. When you thread and torque the connections, then open the service valves according to the manual, refrigerant flows through the sealed circuit. The system has never been "open to atmosphere," so there's no need for evacuation or charging. That is the big difference between a true DIY option and a traditional installation requiring EPA certified technicians.
Typical pre-charged lineset lengths include 16 ft (standard with Zone Air), 25 ft, and in some brands up to 50 ft. Extensions and couplers must be approved by the manufacturer to keep the warranty intact. Zone Air's standard 16 ft line set can be extended to 25 ft with their approved extension kit.
One important clarification: "pre-insulated" and "pre-charged" are not the same thing. Pre-insulated means the lines come wrapped in foam insulation. Pre-charged means refrigerant is sealed inside. Many buyers confuse the two, so always verify the product description before purchasing.
Regarding compatibility, some premium brands like Mitsubishi or LG sell line sets, but they typically don't market them as DIY-those systems usually require a licensed tech for warranty. Zone Air designs the entire package specifically for DIY installers, from the pre charged line sets to the mounting hardware to the manual.
Handle pre charged linesets carefully. No kinks, no crushing, no sharp bends. Damage can void the warranty and cause refrigerant leaks even in sealed systems. Once quick-connect fittings are opened, most brands-including Zone Air-consider the unit non-returnable.
Choosing the Right DIY Mini Split Size (BTU & Room Type)
The rule of thumb is about 20 BTU per square foot for rooms with standard insulation and 8-9 ft ceilings. Mini splits range from 9,000 to 36,000 BTU capacities, so there's a size for nearly every room in your house.
| Room Type | Square Footage | Recommended BTU |
|---|---|---|
| Home office / bedroom | 200–350 sq ft | 9,000 BTU |
| Large bedroom / living room | 350–550 sq ft | 12,000 BTU |
| Open-plan living / master suite | 600–850 sq ft | 18,000 BTU |
| Garage / large open space | 900–1,200 sq ft | 24,000 BTU |
Several factors require upsizing: full south exposure, lots of windows, poor insulation, high ceilings, or a garage or metal building with minimal thermal barrier. A garage in particular can need significantly more capacity due to air leaks and lack of insulation.
Oversizing isn't fine either. An oversized AC unit short-cycles-turning on and off too frequently-which reduces dehumidification and increases wear. Undersizing means your system struggles during heat waves or cold snaps, never reaching the target temperature.
For multi-zone setups, size each indoor head for its specific room rather than dividing total home square footage evenly. The outdoor condenser's capacity should match or exceed the combined BTU of all indoor heads. Use manufacturers' online sizing calculators for final verification before you order.
Single‑Zone vs Multi‑Zone DIY Mini Splits
Single-zone systems condition one room with one indoor unit connected to one outdoor unit. This is the simplest and cheapest DIY install path. Multi-zone systems connect multiple indoor units to one outdoor unit-a dual-zone uses two units, and three-zone systems can condition up to three rooms independently from one condenser.
Single-zone advantages:
- Simplest refrigerant layout and fewest line sets
- Easiest for first-time DIY installers
- Cheapest overall when only one room needs conditioning
- Fewer electrical circuits and less outdoor equipment
Multi-zone advantages:
- One system handles multiple rooms (bedroom + office + living room)
- Fewer outdoor condensers cluttering your yard or wall
- Cleaner exterior look
- Independent temperature control per zone
If you're a first-time DIYer, start with a single zone project-a 9,000 or 12,000 BTU wall mount in a bedroom, office, or garage-before tackling a complex multi-zone system.
Example configurations: a 24,000 BTU dual-zone for a 600 sq ft living room plus a 400 sq ft primary bedroom. Or a 36,000 BTU three-zone for three mid-size bedrooms, or two rooms plus a bonus room above the garage.
Wall Mount vs Ceiling Cassette vs Concealed Air Handlers
Most DIY mini splits are wall mount air handlers, but ceiling cassette and concealed duct units are gaining popularity for homeowners who want a cleaner look without the old wall unit style box sitting high on the room wall.
Wall Mount: The easiest DIY install. No ceiling work, least invasive, and ideal for offices, bedrooms, and garages. Typical sizes run 9K–18K BTU. You mount a plate, hang the unit, and route the line set through the wall behind it.
Ceiling Cassette: These mount flush in a drop ceiling or framed opening and distribute air in two to four directions. They look more built-in but require more carpentry, adequate ceiling cavity depth, and careful condensate planning. Great for rooms where you don't want anything on the wall.
Concealed Duct / Slim Units: These sit above a hallway or in an attic and feed short duct runs to multiple small rooms. They're the least visible option but the most complex to install, requiring duct sizing, balancing, and insulation work.
Zone Air offers all three formats-wall mount, Airframe ceiling cassette, and Thin-Air concealed systems-each optimized for DIY installation with clear templates and hardware included.
First-time DIY installers should stick to wall mount units. Ceiling cassettes are a reasonable next step. Leave fully concealed ducted systems for experienced DIYers or hybrid DIY + contractor projects.
Best DIY Mini Split Brands for Pre‑Charged Line Sets in 2026
Not every mini split brand is DIY-friendly. Some explicitly require licensed HVAC installation for warranty coverage, which defeats the purpose if you're trying to save money and do it yourself. Here's how the major DIY brands stack up.
Zone Air is the top recommendation. Their systems ship with complete pre-charged quick-connect line sets, and their warranty explicitly states that DIY installation does not void coverage as long as you follow the manual and applicable codes. The 9,000 BTU 115V wall mount delivers SEER2 around 23, heating down to -13°F, and covers up to 450 sq ft. Warranty coverage includes 7-year compressor and 5-year parts. The brand has strong customer feedback for support quality and ease of installation.
Senville is a strong runner-up, offering good reliability and value. Their outdoor units are pre-charged for specified line set lengths (up to 25 ft on many single-zone models). However, Senville's warranty typically requires installation by a licensed HVAC contractor, and many models still expect flaring and evacuation steps that go beyond basic DIY. Great hardware, but read the warranty fine print.
Pioneer is another reputable budget-conscious choice with a wide model selection. Register your warranty within 90 days for extended coverage. However, Pioneer doesn't uniformly offer fully pre-charged quick-connect line set systems-many of their models require conventional flaring and vacuuming. Suitable for DIY installers comfortable with those extra tools.
MrCool DIY is heavily marketed to homeowners and does use pre-charged line sets. However, we cannot recommend this brand due to a pattern of negative reviews around long-term reliability, warranty claim denials, and slow support responsiveness. More on this below.
Premium brands like Mitsubishi, Fujitsu, and LG generally assume professional installation and may void the warranty if self-installed, making them unsuitable for a true DIY mini split no contractor setup.
MrCool DIY vs Other DIY Mini Splits (And the Warranty Question)
Many homeowners first encounter DIY mini splits through Mr Cool's aggressive marketing. The brand promises pre-charged line sets in various lengths, tool-free quick-connect fittings, and installation guides aimed at non-professionals. On the surface, it looks like an ideal DIY option.
The reality is more complicated. Reviews on Trustpilot and retail sites like Lowes reveal consistent themes: component failures within one to two years, refrigerant leaks, and-most critically-difficult warranty claim resolution. Multiple customers report that MrCool refused warranty coverage because the unit was "self-installed" or because documentation was missing, despite the company's marketing explicitly targeting DIY installers.
MrCool's official warranty policy states that no installation invoice is required for DIY systems. But in practice, customers describe friction around requiring "authorized service tech" diagnostics, parts shipping delays, and burdensome proof-of-installation requirements. One Lowes reviewer reported a warranty denial specifically because the unit was self-installed-on a product marketed for self-installation.
While some users have perfectly good experiences, the overall reputation and trust signals for MrCool DIY are weaker than brands like Zone Air, Senville, and Pioneer. When you're putting a $2,000+ system on your wall, warranty reliability isn't something you want to gamble on.
When comparing brands, check these warranty details: coverage duration (compressor vs parts), whether DIY install is explicitly covered, registration requirements, response time commitments, and exclusions for installation damage like kinked lines or over-torqued fittings.
Treat MrCool DIY as one option in the market, but strongly compare warranty language and independent reviews before committing. We favor brands with better trust and support history-Zone Air in particular.
Tools & Skills You Need (Before You Order)
Pre-charged line sets remove the need for refrigerant tools, but basic carpentry and electrical skills are still required. You need basic hand tools for a DIY mini split installation-nothing exotic.
Essential tools most DIY installers need:
- Drill and hole saw (2.5–3.5 inches)
- Level and tape measure
- Stud finder
- Adjustable wrenches (two, for holding and turning)
- Torque wrench (for flare nuts if applicable)
- Basic hand tools: screwdrivers, pliers, utility knife
- Soapy water spray bottle (for leak checks)
Safety gear:
- Eye protection and work gloves
- Sturdy ladder
- A helper for lifting the outdoor condenser and indoor air handler
The minimum skill set: you should be comfortable drilling through exterior walls, mounting brackets into studs or masonry, routing and protecting line sets along walls, and either plugging in a 115V unit or coordinating a 230V circuit with an electrician.
A flaring kit is required for copper line set connections on non-pre-charged systems, but most DIY installers do not need one for systems with sealed, factory pre-charged line sets. You still must follow torque specs and leak-check with soap solution at every joint.
For ceiling cassette or concealed units, add carpentry skills to the list: framing openings, repairing drywall, and sealing penetrations.
Planning Your DIY Install: Location, Line Set Route, and Power
Careful planning for electrical work and mounting locations is essential for proper mini-split installation. Measure twice, drill once-especially when you're putting a 3-inch hole through your exterior wall.
Indoor location: Mount wall units high on an exterior wall, ideally centered on the room for even air distribution. Avoid placing above heat sources, behind doors, or in direct sunlight. Leave the manufacturer-specified clearances on all sides of the air handler for proper airflow and service access.
Outdoor placement: Set the condenser on a level pad or wall brackets with manufacturer-specified clearances from walls, fences, and property lines. A proper installation includes ensuring adequate airflow clearances around the outdoor unit. In cold climates, elevate the unit above expected snow depth. Keep it accessible for maintenance.
Line set route: The line set routing should minimize bends and avoid sharp kinks. Plan the shortest, smoothest path between indoor and outdoor units with gentle sweeping curves. Stay within the model's minimum and maximum line set lengths, and avoid coiling excess line too tightly behind the air handler-this creates oil traps.
Condensate drain: The indoor unit's condensate drain line should slope downwards for proper drainage. Plan gravity drainage to a safe discharge point. If gravity isn't possible (for example, with a ceiling cassette below the roofline), use a condensate pump. Never route the drain hose uphill.
Electrical power: Mini-split systems typically run on 115V or 230V circuits. Most 9,000 BTU systems plug into a dedicated 115V outlet, while larger 208–230V systems require a dedicated circuit and outdoor disconnect switch. Electrical connections must match the specific voltage requirements of the mini-split system. Check your panel capacity and local code-this often means involving an electrician for the power side.
Step‑by‑Step Overview: DIY Installation With Pre‑Charged Line Sets
This is a high-level, safety-conscious walkthrough-not a replacement for your manufacturer's manual. Exact steps vary by brand and model. Always read the full installation manual before starting.
- Mount indoor air handler. Mark stud locations using the supplied mounting plate template. Check for level. Secure the plate with appropriate anchors or lag screws depending on wall material.
- Drill wall penetration. Drill a slight downward-sloped hole (roughly 2.5–3.5 inches) toward the outside for the line set, drain hose, and control cable. Insert the supplied wall sleeve to protect the lines from sharp edges.
- Hang indoor unit. Feed the line set, condensate drain, and control cable through the wall sleeve. Hook the air handler onto the mounting plate and confirm it sits level and snug.
- Set outdoor unit. Place the outdoor condenser on a level pad or wall brackets. Check for level and loosely secure it, leaving enough slack in the line set to make connections comfortably.
- Connect pre-charged line sets. Carefully uncoil the line set without kinking. Align color-coded caps, thread connections by hand first, then use wrenches to the specified torque. Open service valves according to the manual to release refrigerant into the circuit.
- Electrical and control wiring. Connect the indoor-to-outdoor communication cable by matching terminal numbers and polarity. Connect main power to the outdoor disconnect per local code. Most homeowners complete a single-zone install in about two hours once they reach this stage, though total installation including prep runs longer.
- Commissioning. Testing for refrigerant leaks after installation is crucial for ensuring tight seals-spray soapy water on every connection and watch for bubbles. Restore power, run the system in cooling and heating modes, and verify condensate drainage and airflow from the air handler; after leak-checking, confirm the system works properly by checking for strong airflow and a normal temperature drop in cooling mode.
What a DIYer Can (and Can't) Do Legally Without an HVAC License
In the U.S., EPA Section 608 regulates refrigerant handling. However, factory-sealed DIY systems with pre-charged line sets are designed so homeowners never open the refrigerant circuit. No HVAC license is required for DIY mini split installation when using these sealed systems.
Most jurisdictions allow homeowners to install their own equipment on their own property. But electrical work-especially 230V circuits, new breakers, and outdoor disconnects-may still require permits and/or licensed electricians. Permits may be required for installing mini-split systems in many municipalities, so check your local building and electrical codes before starting.
DIY installers should not cut, flare, or open refrigerant lines on charged systems. Doing so can violate federal regulations, void warranties, and create safety hazards.
A smart "hybrid DIY" approach works well: you mount and route everything yourself, then have a licensed electrician verify the wiring and an HVAC tech do a pressure test or final check if desired. Even if DIY is legal in your area, insurance and home resale disclosure may require proof that work met code-keep documentation.
Will DIY Installation Void My Warranty?
Warranty policies vary widely. Some brands fully support DIY installs. Others require factory-authorized contractors. This single detail can cost you thousands if something goes wrong.
Zone Air is the clearest example of a brand that explicitly allows DIY installation while still offering strong coverage-7-year compressor and 5-year parts-when the system is installed according to their manual and within specified limits.
By contrast, many traditional manufacturers state "warranty valid only when installed by a licensed contractor." Mitsubishi and Fujitsu fall into this camp, as does Senville for most of their product line.
MrCool markets its MrCool DIY systems with homeowner installation in mind, but has mixed feedback around how smoothly warranty claims are processed in practice. Multiple customers report claims being denied or delayed despite following the marketed DIY approach.
Key warranty details to check before buying:
- Coverage duration (compressor vs parts)
- Whether DIY install is explicitly allowed
- Whether registration is required (and by when)
- Exclusions for installation damage (kinked lines, over-torqued fittings, improper electrical)
- Response time commitments and parts availability
Keep detailed records: dated photos of every installation step, your purchase receipt, permit approvals if applicable, and serial numbers. This documentation streamlines any future warranty claim.
Realistic Cost Savings of a DIY Mini Split Install
Professional mini split installation costs $2,000–$4,000+ per zone in most U.S. markets in 2025–2026, particularly for heat pump systems and multi-zone setups. A DIY mini split costs about half of professional installation in most cases.
DIY mini split installation saves $1,500 to $3,000 per zone in labor alone. Add another $400–$1,800 in savings by not buying or renting vacuum pumps, manifold gauges, recovery equipment, and refrigerant-none of which you need with pre-charged line sets. Total savings from DIY installation can reach $5,050 per zone when you factor everything in.
Concrete example: A Zone Air 9,000 BTU 115V DIY system costs approximately $1,899 including the pre-charged line set, mounting hardware, and everything needed. Contractor quotes for a similar capacity system with installation typically run $4,000–$6,000 depending on region. Homeowners saved over $3,000 compared to contractor quotes on single-zone installs.
Federal and state rebates for qualifying high-SEER2 heat pump systems can further reduce your net cost. Tax credits under the Inflation Reduction Act apply to systems meeting efficiency thresholds, and many utility territories offer additional electrification incentives-even for DIY installations, as long as equipment meets requirements.
Balance the savings against potential hidden costs: upgrading your electrical panel for a new 230V circuit, buying tools you don't own, and the value of your own time and learning curve. Even with these extras, most DIY mini splits come out significantly cheaper than fully contractor-installed systems for the same BTU and efficiency level.
Common Mistakes DIY Installers Make With Line Sets
Even pre-charged systems can be ruined by physical damage or incorrect routing. This section is your troubleshooting-prevention guide.
Physical mistakes:
- Kinking the copper while pulling through tight holes
- Bending too sharply (maintain minimum bend radius from the manual)
- Crushing insulation under clamps or staples
- Overtightening flare nuts, which damages the seal seat
Layout mistakes:
- Exceeding maximum line set length or height difference between indoor and outdoor units
- Leaving large "oil traps" in vertical runs that prevent proper lubricant return
- Coiling excess line too tightly behind the air handler
Connection mistakes:
- Cross-threading fittings (always start by hand)
- Failing to torque to spec (too loose leaks, too tight damages)
- Opening service valves before all connections are fully tightened
Drainage errors:
- Routing the condensate drain uphill or without a proper trap
- Failing to secure the drain hose, leading to interior leaks and water damage
Read the installation manual fully at least once before cutting any holes or uncoiling any lines. Follow the manufacturer's line set routing diagrams exactly. Most mistakes happen because someone skipped a step they thought was obvious.
Cold‑Climate Performance: Using DIY Mini Splits as Primary Heat
Modern inverter heat pump mini splits-especially models rated to -13°F-can often replace or significantly reduce dependence on electric baseboard, propane, or oil heat. This makes them viable as primary heat in much of the U.S.
Zone Air's cold-climate DIY systems are the standout example, with SEER2 ratings around 23 and HSPF2 around 10 for efficient heating even in the dead of winter. Their systems maintain useful heating output down to -13°F ambient temperature, covering most winter conditions in the Midwest and Northeast.
Performance does drop at very low temperatures. Below -13°F, capacity and efficiency decrease notably. Homeowners in extreme climates should keep backup heat-a gas furnace, wood stove, or electric resistance-for the coldest snaps. But for the vast majority of winter hours, a properly sized heat pump handles the load and can also keep a house comfortable and cool in summer at a fraction of the operating cost.
Proper sizing and building envelope improvements (insulation, air sealing) are critical when relying on a mini split as your main heat source. A poorly insulated house will overwork any system.
Example scenario: A well-insulated 1,200 sq ft home with winter lows around 0°F could use a 24,000–30,000 BTU multi-zone DIY heat pump as primary heat, with each zone controlling its own room temperature. Utilities and states increasingly promote heat pump adoption with rebates that can apply even to DIY installations.
Ceiling Cassette & Concealed DIY Installs: When to Attempt Them
Ceiling cassettes and concealed duct units offer the cleanest look-no wall unit visible at all. But they add structural and condensate complexity that puts them in a different category from a standard wall mount DIY install.
For ceiling cassette systems, you'll need to frame an opening in the ceiling with adequate cavity depth (typically 10–14 inches above the finished ceiling). Ensure access for future service via an access panel or removable drop ceiling tile. The air handler sits above the ceiling and delivers air through a visible grille flush with the ceiling surface.
Cassette line sets and drains typically route through attic spaces or joist cavities. This requires more advanced planning to avoid structural members, maintain proper fall on the drain line, and insulate everything to prevent condensation on cold surfaces.
Concealed units feed short duct runs to multiple small rooms from a central location above a hallway or in an attic. Proper duct sizing, balancing, and insulation are essential. This is the most complex DIY install by far.
Only confident DIYers with carpentry experience should attempt full cassette or concealed installs solo. Others should consider hiring a carpenter for the framing and drywall portions while handling the mechanical and electrical DIY portions themselves.
Zone Air's Airframe (ceiling cassette) and Thin-Air (concealed) product families are designed with DIY installers in mind, including clear installation templates and pre-measured hardware.
Maintenance & Long‑Term Care for DIY Mini Splits
Even though installation can be DIY, mini splits need routine maintenance to keep delivering their rated efficiency and lasting 15+ years.
Basic homeowner tasks:
- Clean or replace indoor filters every 1–3 months
- Gently clean the indoor coil and blower wheel as needed (mild detergent and soft brush)
- Keep the outdoor coil free of leaves, grass clippings, and debris
- Ensure condensate drains remain clear and free-flowing
- Check line set insulation each season for UV damage or animal chewing; repair promptly
Annual or biannual professional checkups are optional but helpful. A tech can verify refrigerant levels, inspect the electrical connections, and catch slow leaks before they become expensive problems.
If your system has Wi-Fi control or a smart-controller app, apply firmware updates periodically for optimal performance and bug fixes.
Good maintenance practices protect your warranty and help the system stay quieter and more efficient than a noisy window unit over many summers and winters. Neglect is the fastest way to turn a works great system into a repair headache.
When to Call a Pro (Even If You're Doing a DIY Install)
Mixing DIY and professional help is often the safest, most cost-effective path. You don't have to choose one or the other for every step. Think of it as putting your labor savings toward strategic pro involvement where it matters most.
Call a licensed electrician when:
- You need a panel upgrade or new 230V breaker
- Running new buried or surface conduit to the outdoor unit
- Installing the outdoor disconnect switch
- You're unsure about any wiring in the building
Call an HVAC tech when:
- You notice visible damage to a pre-charged line set before or during install
- You suspect a refrigerant leak (hissing, ice buildup, warm air from the unit)
- You see repeated compressor trips or error codes after a proper install
- You need a pressure test on a non-pre-charged system
Call a contractor or carpenter when:
- Cutting into engineered joists for ceiling cassette installs
- Modifying load-bearing framing
- Running ducts through fire-rated assemblies
Budget a small amount for professional help even on a DIY project. Think of it as insurance against costly mistakes that could void the system's warranty. The goal is a safe, code-compliant system that lasts 10–15+ years-whether the install is 100% DIY or a smart hybrid.
Is a DIY Mini Split With Pre‑Charged Line Sets Right for You?
The ideal DIY mini split candidate has moderate tool skills, willingness to read and follow detailed instructions, access to basic tools, and comfort with small construction projects. If you've ever installed a ceiling fan, hung cabinets, or run electrical for a previous owner's half-finished project, you have enough skill to handle a wall mount mini split.
Benefits of DIY installation:
- Save $1,500–$3,000+ per zone in labor costs
- Install on your own schedule-no waiting weeks for a contractor
- Add zones (garage, office, addition) without touching existing ductwork
- Genuine learning experience that pays dividends on future projects
Drawbacks to consider:
- Time investment-your first install takes longer than a pro's
- Full responsibility for installation errors
- Possible need for permits and inspections depending on your municipality
- Less "hand-holding" compared to full-service HVAC installs
If you're leaning toward DIY, start simple. A single-zone wall mount with a pre-charged line set in one room-an office, bedroom, or garage-is the perfect first project. Don't jump straight into a three-zone concealed system.
Compare specific Zone Air DIY systems by BTU and form factor against quotes from local HVAC contractors. Seeing the real-world savings side by side makes the decision clear for most homeowners.
With the right brand, clear instructions, and pre-charged line sets, you can install a mini split heat pump in a weekend-without ever calling an HVAC contractor.
Compare Zone Air pre-charged DIY systemsCalculator
Your run cost depends on your ZIP.
Run our calculator with your ZIP, your existing system, and the mini split you're considering. It pulls climate and current electricity-rate data to show annual operating cost, savings, and simple payback.
Run the numbers for your home→