Install guide · MRCOOL DIY 5th Gen
MRCOOL DIY 5th Gen 12000 BTU Precharged Line Set Installation 2026 Guide
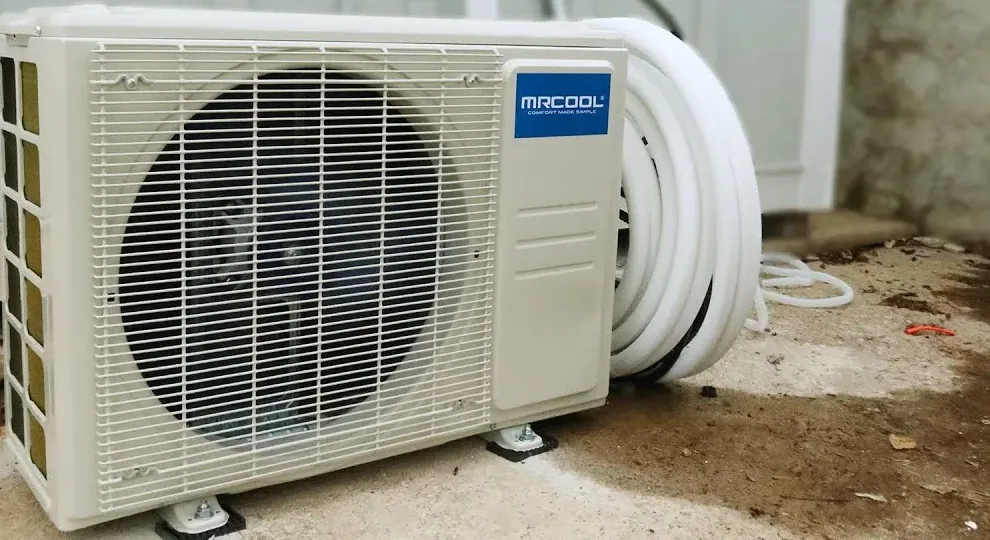
Are you installing a MRCOOL DIY 5th Gen 12,000 BTU mini split in 2026? This guide walks you through each step of the pre charged line set installation, from planning and routing to connecting the quick connect valves and running the unit for the first time.
Quick Overview: 5th Gen 12k BTU DIY Mini Split & Line Set
The MRCOOL DIY 5th Generation 12,000 BTU system is a single-zone, wall-mounted heat pump that runs on 115V power and uses eco-friendly R 454B refrigerant. It can cool or heat areas between 350 and 500 square feet, making it a solid option for bedrooms, home offices, garages, and additions. The system is designed for easy installation and safety, which is why MRCOOL ships it with a 25 foot pre charged quick connect line set that eliminates the need for vacuum pumps or refrigerant gauges.
This post focuses specifically on installing that pre charged line set on the 12k BTU 5th gen unit, covering the common 25 ft length and what to do if your run is longer.
While MRCOOL DIY is a popular choice, Zone Air DIY systems often deliver more flexibility for comparable installs. Zone Air supports multi-zone configurations with mixed indoor unit types (wall-mounted, ceiling cassette, and concealed ducted air handlers on one condenser), offers custom line set lengths, and tends to earn stronger customer reviews.
This guide is written for competent DIYers in 2026. Step-by-step details and safety considerations start right below.
Understanding the MRCOOL DIY 5th Generation 12,000 BTU System
The 12k BTU 5th gen unit carries a 23.5 SEER rating for energy efficiency and operates on a 115V, single-phase, 60Hz dedicated circuit. It covers up to 500 square feet and works as both an air conditioner and heat pump.
The biggest change from earlier generations is the switch from R-410A to R 454B refrigerant, a lower global warming potential compressed gas classified as A2L (mildly flammable). The 5th generation also features improved quick connect fittings with Intertek-certified valve controls rated for approximately 921 PSI.
What "DIY" means here is straightforward: the line set arrives factory pre charged and sealed. Setup does not require vacuuming the refrigerant lines, and a precharged installation typically does not require professional refrigerant gauges. You connect both ends, torque the fittings, open the service valves, and you're in business.
The line set itself consists of copper refrigerant tubing with a 1/4" liquid line and a 1/2" suction line for the 12k wall-mount model. Pre charged R 454B is factory sealed inside.
A quick comparison worth keeping in mind: Zone Air DIY systems use custom-length line sets built to your exact run distance, which avoids chaining multiple quick couplers together. MRCOOL DIY relies on standard lengths plus extension kits when your run exceeds the included 25 ft.
What Comes in a 2026 MRCOOL DIY 5th Gen 12k BTU Kit
A typical 2026 kit for the 12k BTU system ships with:
- Outdoor condenser unit
- Indoor air handler (wall-mounted)
- 25 ft pre charged quick connect line set (1/4" liquid, 1/2" suction)
- Communication cable
- Drain hose
- Wall template, wall sleeve, and basic hardware
- Remote control with built-in Follow Me function
| Included | Not Included |
|---|---|
| Pre charged 25 ft line set | Dedicated electrical circuit |
| Indoor air handler + condenser | Outdoor disconnect switch |
| Remote control + communication cable | Condenser pad or wall bracket |
| Drain hose + wall sleeve | Line set cover (e.g., LineGuard) |
| Mounting hardware + template | Hole saw, torque wrench, sealant |
The MRCOOL DIY 12,000 BTU system costs $2,359.00 at regular price, and free shipping is included on every order. For reference, the MRCOOL DIY 9,000 BTU system is priced at $2,329.00, while the MRCOOL DIY 18,000 BTU system costs $2,909.00. Check stock before ordering, as the 5th gen series can sell fast.
MRCOOL sells LineGuard covers and condenser pads separately. Zone Air DIY packages may bundle accessories more flexibly, especially for multi-zone jobs with mixed air handler types.
Planning Your MRCOOL DIY Line Set Route
Planning your line set path before drilling a single hole saves time and prevents costly mistakes. You need to respect the maximum total line length of 75 ft (with extensions), avoid sharp bends, and maintain manufacturer clearances around both units.
Common routing: exit straight through the wall behind the indoor air handler, then run down exterior siding to the condenser pad. If studs or obstructions interfere, route side-exit with broad, sweeping bends.
Key planning rules:
- Never bury pre charged line sets inside walls or ceilings. Keep lines accessible in a line set cover for future inspection and service.
- Maintain gentle bend radius on copper tubing. Tight 90° kinks cause refrigerant restrictions or damage.
- Maximum vertical separation between indoor and outdoor units is approximately 32.8 ft.
- Coil any extra line length horizontally near the condenser, not vertically behind the air handler.
Measure the exact distance between your indoor air handler location and your condenser placement. If the run exceeds 25 ft, you will need MRCOOL extension kits with quick couplers. Zone Air can supply custom length line sets that eliminate these extra joints entirely.
Safety, Code, and Electrical Considerations (2026)
Even though this is a DIY mini split, electrical connections must comply with local electrical codes. In many jurisdictions, running a dedicated circuit and installing a disconnect switch requires a permit or licensed electrician.
Do:
- Shut off power at the breaker before any work
- Use PPE (gloves, eye protection)
- Install an outdoor disconnect switch within sight of the condenser
- Use correct wire gauge for the 115V circuit (typically 12 AWG, ~18A minimum circuit ampacity, 20A max breaker)
- Register your system for warranty coverage
- Contact a licensed electrician if local code requires it
Do Not:
- Cut, modify, or puncture the pre charged line set
- Vent R 454B refrigerant (it is a mildly flammable A2L compressed gas)
- Skip the outdoor disconnect switch
- Attempt refrigerant repair yourself-leave that to an EPA-certified technician
- Ignore local permit requirements
R-454B is mildly flammable. While DIYers are not opening the sealed system during installation, any repair that requires opening refrigerant lines must be handled by a certified professional.
Step‑by‑Step: Installing the Indoor Air Handler
- Mount the wall bracket. Use the supplied template to find wall studs. Ensure the bracket is level and positioned with proper clearance from the ceiling (typically 6–8 inches) and side walls.
- Drill the wall penetration. Use a 3.5-inch hole saw for the 12k model. Angle the hole slightly downward (about 5°) toward the outside so condensate drains properly. The installation process involves routing lines through a wall hole for drainage. Install the wall sleeve or grommet to seal the opening.
- Feed the line set bundle. Pass the copper tubing (1/4" liquid and 1/2" suction lines), drain hose, and communication cable through the hole together. Installation of precharged line sets requires careful handling to prevent kinks-keep bends broad and deliberate.
- Connect the drain hose. Attach it to the air handler drain port, secure with a clamp, and confirm a continuous downward slope to the outside.
- Hang the air handler. Lock the indoor unit onto the bracket and verify it's level. A mis-leveled unit will cause condensate to leak inside the room.
Routing and Connecting the Pre‑Charged Line Set
Uncoil the pre charged line set gently outdoors. Keep factory caps on the quick connect fittings until you are ready to make connections-contamination from dust or moisture compromises seal integrity.
Route the refrigerant lines from the air handler down the wall to the condenser. Store any extra length in a horizontal coil near the condenser. Secure lines every 3–4 ft with clips.
When connecting:
- Clean mating surfaces on the fittings.
- Quick connect fittings must be aligned straight to protect internal seals. Avoid crossing threads while connecting quick connect fittings.
- Hand-thread first to confirm proper engagement, then tighten with two wrenches (one to back-hold, one to torque) per the MRCOOL installation manual torque specs.
- Once both indoor and outdoor connections are torqued, perform a leak check. Leak testing with soapy water is important before opening refrigerant valves-spray every joint and watch for bubbles.
- If no leaks are found, open the service valves per MRCOOL instructions to release the R 454B charge into the line and air handler. No vacuum pump is used.
- Re-check joints after the system pressurizes. If bubbles appear, shut valves, retighten to spec, and retest.
Zone Air systems often come with custom-length line sets that minimize the number of quick connect joints, reducing potential leak points compared with chaining multiple MRCOOL DIY extensions together.
Finishing Touches: Line Set Cover, Condenser Mounting, and Start‑Up
Install a line set cover over the insulated lines, drain hose, and cable to protect against UV exposure and physical damage. Route around corners with gentle sweeps.
Set the condenser on a level pad or rated wall bracket with sufficient clearance on all sides (12–24 inches behind, 6–12 inches on sides, 60 inches above). Make sure the unit is built on a stable, level surface.
For electrical, land your dedicated 115V circuit conductors in the disconnect and condenser terminal box per the wiring diagram. Confirm correct polarity and grounding with copper conductors.
Start-up steps:
- Restore power at the breaker and disconnect.
- The system is compatible with the SmartHVAC app and voice commands through Google Assistant, so pair the unit if you want smart control from your phone.
- Use the remote to enter cooling mode. The system features a built-in Follow Me function for temperature detection, which tracks the temperature at the remote's location rather than the air handler.
- Verify indoor fan, outdoor fan, and compressor all engage. Listen for unusual hissing or vibration. Feel the lines-the suction line should be cool, the liquid line slightly warm.
- Monitor for 15–30 minutes. Check supply versus return air temperature difference (target ~16–20°F), confirm condensate is draining outside, and verify no error codes on the display or app.
Maintenance, Warranty, and When to Consider Alternatives
Ongoing maintenance checklist:
- Clean indoor air filters monthly
- Wash the outdoor coil annually (power off first)
- Inspect line set insulation and covers yearly
- Check mounting hardware and fittings for vibration or looseness
- Monitor the app for error codes
A 5-year protection plan costs $124.99 and can be added at purchase. MRCOOL's standard 2026 warranty typically covers parts for approximately 5 years and the compressor for about 7 years, with no registration required, provided the 5th generation system is installed per manufacturer guidelines.
Common mistakes that void coverage:
- Cutting or altering the pre charged line set
- Improper electrical work (wrong voltage, missing disconnect, wrong gauge)
- Burying connections in inaccessible wall or ceiling cavities
- Exceeding maximum line set length or vertical rise limits
For homes needing multi-zone service, ceiling cassettes, or concealed ducted air handlers on the same condenser, Zone Air DIY systems tend to be more versatile and often slightly more efficient than comparable MRCOOL DIY setups. Zone Air also earns stronger customer reviews-averaging 4.8 out of 5 stars-while MRCOOL struggles on platforms like Trustpilot, averaging just 3.2/5 stars as of September 2026. If your project demands longer runs, mixed indoor unit types, or you simply want fewer quick connect joints in the series, Zone Air is worth serious consideration.
A careful homeowner can absolutely find success installing a MRCOOL DIY 5th Gen 12k BTU mini split line set by following manufacturer instructions and the steps in this guide. But before you commit, take time to evaluate whether a more flexible system like Zone Air better fits your home and long-term comfort plans.
Calculator
Your run cost depends on your ZIP.
Run our calculator with your ZIP, your existing system, and the mini split you're considering. It pulls climate and current electricity-rate data to show annual operating cost, savings, and simple payback.
Run the numbers for your home→